The scan-clean-export workflow for a folder of DSLR-scanned film, with one image deserving manual touch-up.
Before You Start
- Disable any auto dust removal in your scanner software — DustMagic handles this better and shouldn’t compete with another tool.
- Scan to TIFF, 16-bit if possible. JPEG works but you keep more headroom in TIFF.
- Disable colour correction in the scanner — colour-grade later in Lightroom or Capture One.
1. Import Your Scans
- Click Import Images (Ctrl+I) and select your scans.
- The first image opens with detection running automatically.
2. Set the Two Things That Matter Most
- Film Type — Slides for positives, Negatives for inverted scans where dust appears bright.
- Profile — start with Conservative (the DM default).
3. Review with the View Modes
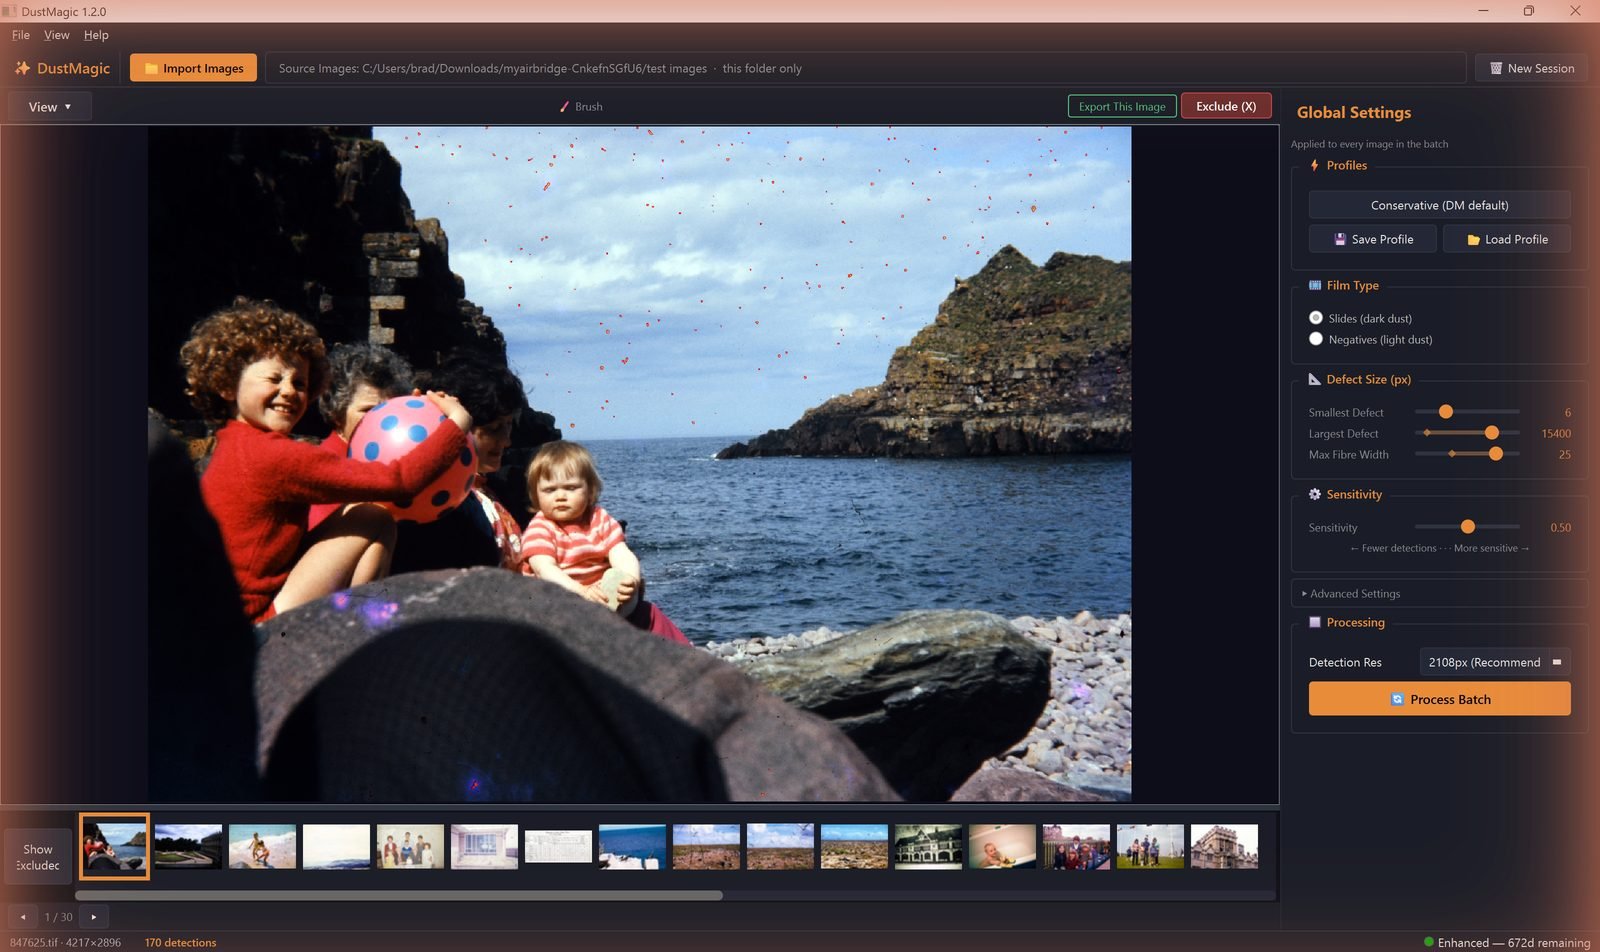
- 2 Detection Overlay — red shows what will be removed. Look for false positives on faces, fabric, foliage.
- 4 Inpainted — the cleaned result. Confirm it looks natural.
- 5 Split View — sweep the divider across high-detail areas.
4. Tune If Needed
- Dust missed? Nudge Sensitivity right.
- Texture being flagged? Raise Texture Penalty in Advanced Settings.
- Sharp scans, dust still missed? Disable Focus-Based Filtering.
- Visible scratches? Enable Scratch Detection.
5. Handle Exceptions with the Brush
Arrow through the filmstrip with ← →. If you find an image where automatic detection is missing or over-detecting, use the Smart Brush Tool:
- Press B (or click the Brush toggle in the toolbar) to switch it on.
- Left-click to add dust selections (smart brush — only marks actual dust under the cursor).
- Right-click to remove false positives.
- Scroll wheel to resize the brush.
- Ctrl+click for solid-fill mode (overrides smart detection).
- Click Export This Image to save the touched-up image — its filmstrip thumbnail gets a green exported tick.
- Ctrl+Z undoes brush strokes.
6. Process the Rest
- Click Process Batch and confirm — the dialog shows the image count and output folder. DustMagic cleans every image in parallel, and you can halt with Stop Batch at any point.
- Cleaned files:
cleaned/. Originals untouched. Review detection masks in-app (Mask Only / Split View).
Save the Recipe
Once a setup works for a roll, click Save Profile and name it descriptively (“Portra 400 lab scans”, “Velvia 50 home-scanned”). Next time, one click loads everything.
Next Steps
- Working at high volume — 4.3: High-Volume Processing Tips.
- Save and recall settings — 4.4: Saving & Loading Custom Profiles.
- Something looks wrong — 5.4: Troubleshooting Bad Results.