DustMagic gives you five view modes for comparing before, after, and what’s about to be removed. Switch between them with keys 1–5 or pick them from the View menu in the toolbar.
1 — Original
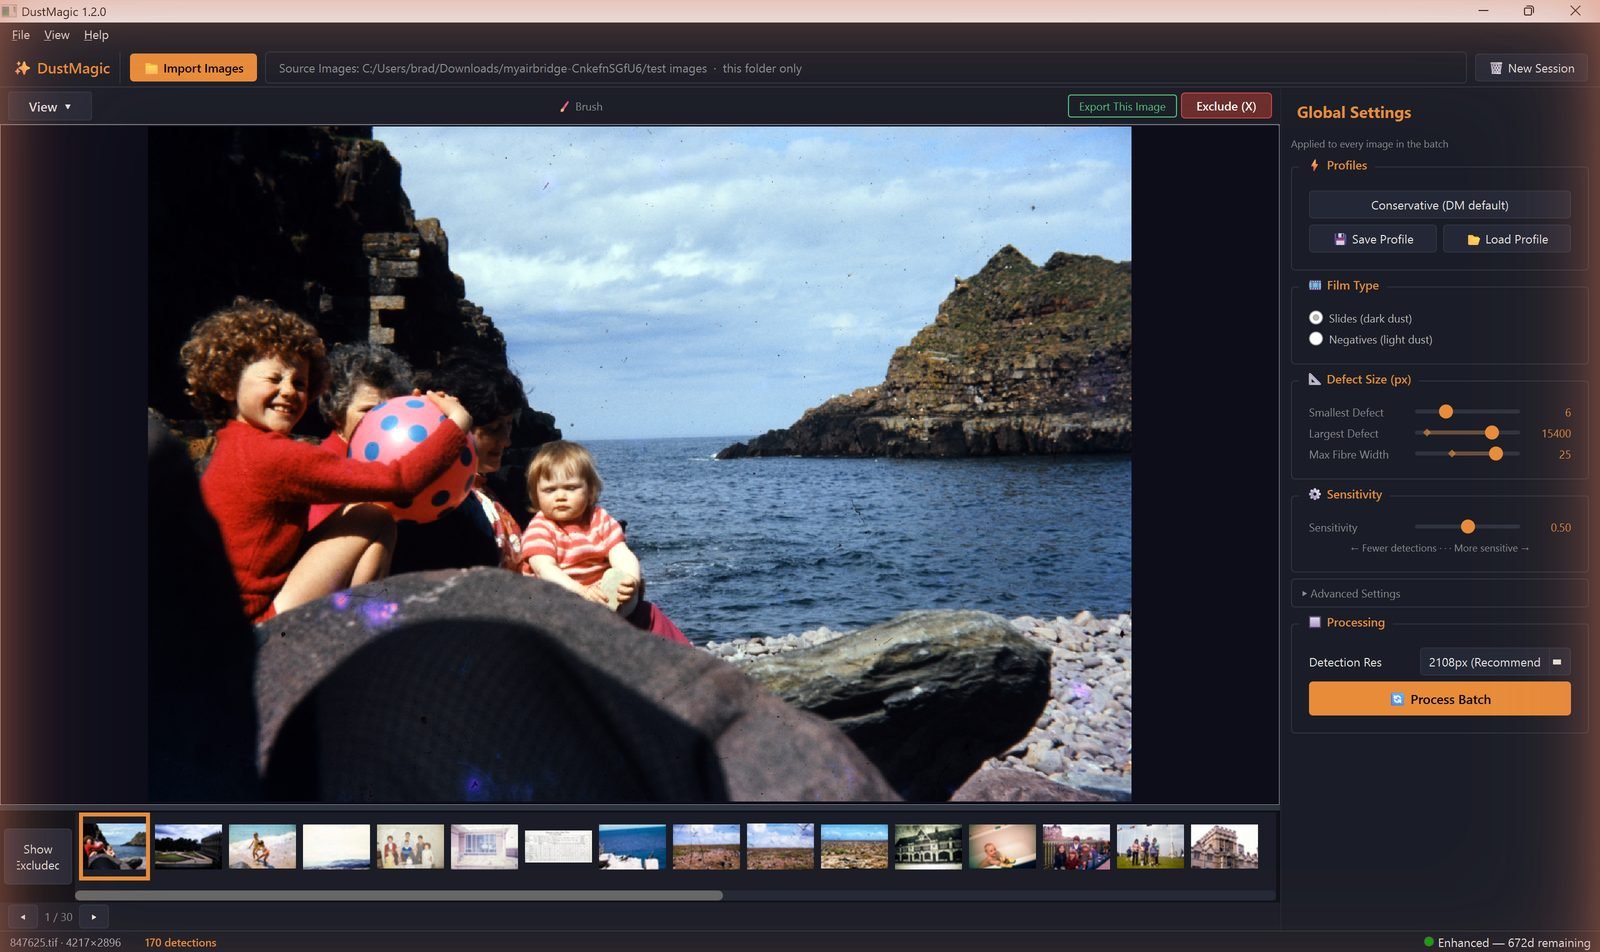
The unprocessed scan exactly as imported. Useful as a baseline reference.
2 — Detection Overlay

The main working view. Red highlights every pixel DustMagic intends to inpaint. Use this while tuning Sensitivity and Texture Penalty.
3 — Mask Only
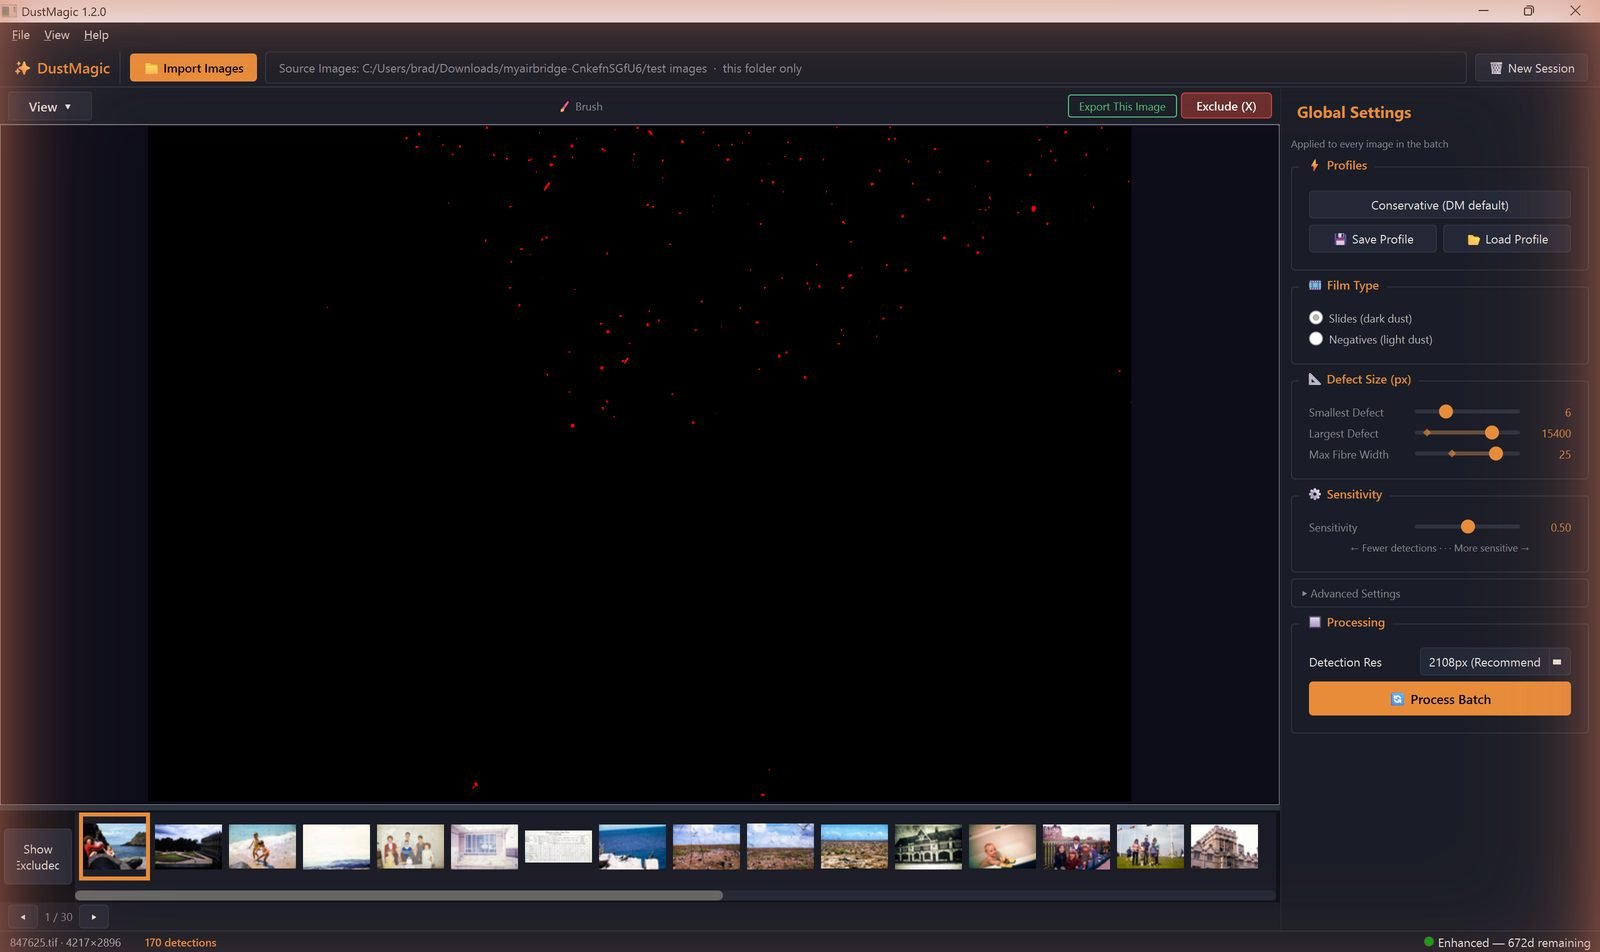
Strips the image away and shows the detection mask in red on black. The fastest way to spot patterns of false positives across an image — clusters along edges, repeated marks across faces, etc.
4 — Inpainted
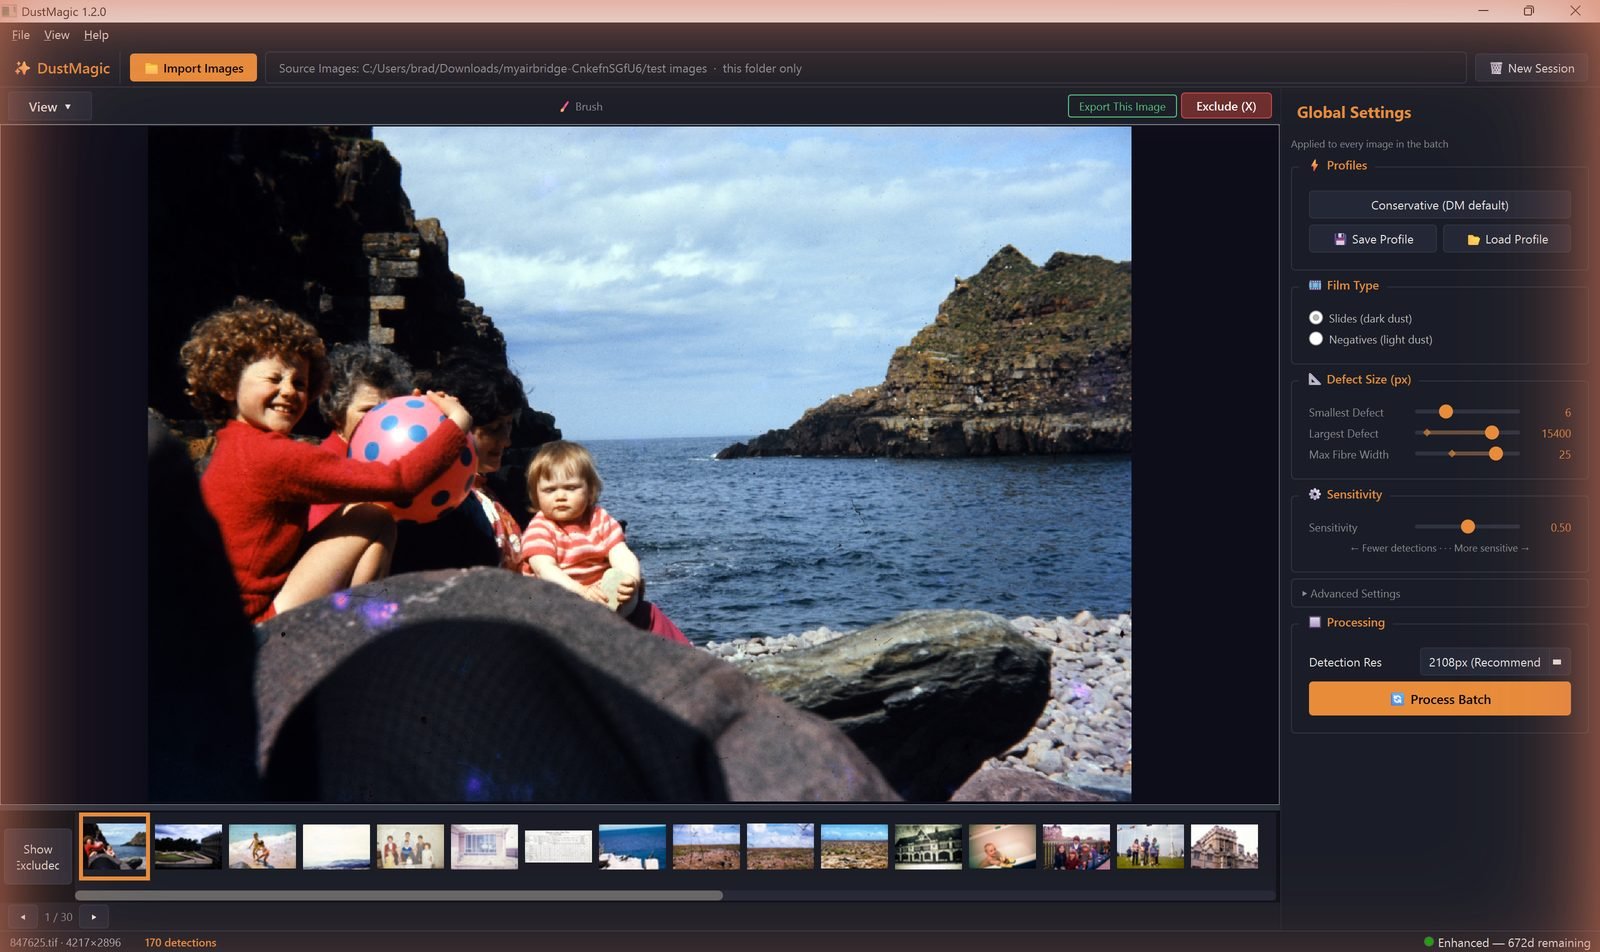
The cleaned output. Generated when you switch to this view, so the first switch may take a moment on large images.
5 — Split View

Before/after side by side. Move your mouse left and right to sweep the divider across the image. The single best view for sanity-checking subtle changes in skin, foliage, and textured areas.
Zoom and Pan
- Scroll wheel — zoom in and out at the cursor.
- Click and drag — pan when zoomed in.
- Double-click or press 0 — fit the image back to the view.
How to Use the Views
- Start in Detection Overlay (2) — confirm Sensitivity is in the right zone.
- Switch to Mask Only (3) — scan for clusters or patterns of false positives.
- Switch to Inpainted (4) — confirm the cleaned result looks natural.
- Finish in Split (5) — sweep across high-detail areas (faces, foliage, fabric) to verify nothing important has been softened.
Next Steps
- Adjust what gets detected — 2.3: All Settings Explained.
- Manually fix exceptions with the Smart Brush Tool — 4.1: Cleaning Scanned Film Photos.